
Main Courses
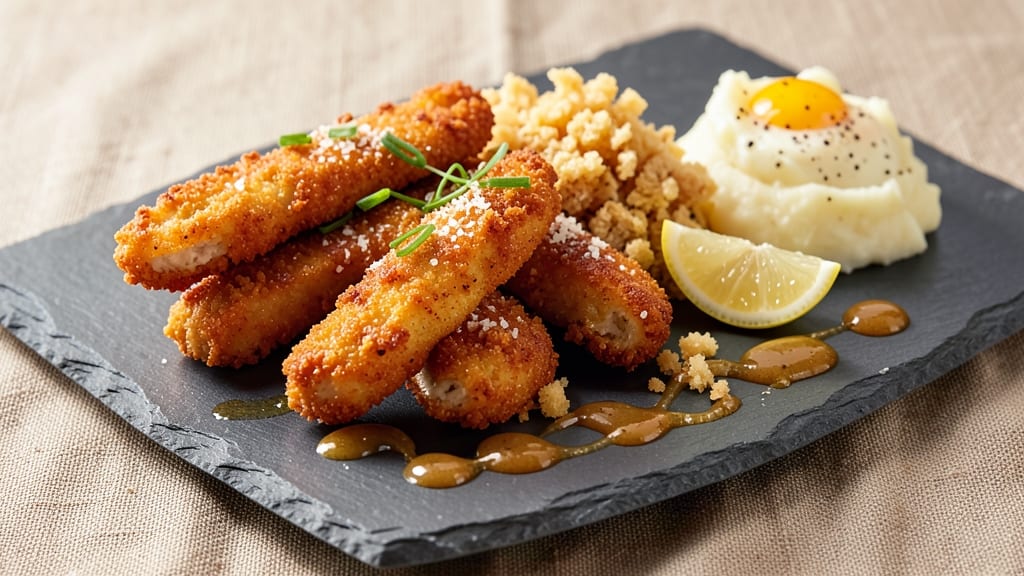
This air fry chicken fingers recipe delivers restaurant-quality crunch in just 15 minutes—no deep frying required. The secret lies in a triple-crusted coating that stays crispy outside while keeping the chicken juicy inside, a technique I perfected after years of trial and error with different breading methods.
The process is surprisingly simple: you'll start with cut chicken tenders, coat them in a light batter, then press them into a crunchy panko-parmesan mix twice for maximum texture. The air fryer works magic by circulating hot air evenly, creating that golden-brown crust without the mess of deep frying.
What you end up with is fingers that are shatteringly crisp yet tender enough to pull apart easily.
What makes this recipe stand out is the balance—no soggy centers or burnt exteriors. The triple layer of coating ensures every bite has that satisfying crunch, while the air fryer keeps things quick and efficient.
Serve with your favorite dipping sauces for the ultimate comfort food experience that's actually healthy enough to enjoy without guilt.
This method works perfectly for weeknight dinners, game day snacks, or even a quick lunch. The beauty of air frying is that it requires minimal prep and cleanup, making it ideal for busy schedules. Let's get started on creating fingers that'll have everyone asking for seconds!
Ingredients for air fry chicken fingers
Short list for restaurant-style crunch—no deep fryer needed.
| Ingredient | Amount | Notes |
|---|---|---|
| Chicken Tenders 🍗 | 1 ½ lb | Cut into 1-inch strips, boneless |
| All-Purpose Flour 🌾 | ½ cup | For light batter coating |
| Large Eggs 🥚 | 2 whole | Beaten for even coating |
| Japanese Panko Breadcrumbs 🍞 | 1 ½ cups | Light and crispy preferred |
| Parmesan Cheese 🧀 | ½ cup | Freshly grated from block |
| Ground Black Pepper 🌶️ | 1 tsp | Freshly ground for flavor |
| Garlic Powder 🧄 | ½ tsp | For subtle seasoning |
| Salt 🧂 | 1 tsp | Kosher preferred for seasoning |
| Vegetable Oil Spray 🫒 | 2 tbsp | For air fryer coating |
| Dipping Sauce (Optional) 🥄 | ½ cup | Honey mustard or ranch |
The chicken tenders are the star, so grab the boneless, skinless kind from the meat counter—Trader Joe's or Costco often have the best prices. Look for even-sized strips around 1-inch thick for consistent cooking. The panko makes all the difference—Japanese-style is lighter than regular breadcrumbs, giving you that perfect airy crunch. I always buy extra because it disappears fast. The Parmesan? Freshly grated from a wedge is key—pre-grated gets clumpy and ruins the texture. Grab a wedge from the deli section if you can.
No panko? Crushed cornflakes work in a pinch, though they won't be as crispy. Short on Parmesan? Pecorino Romano has a sharper bite that pairs well. The flour and eggs are your basic batter—don't skip the beating part, or the coating won't stick. For the air fryer, vegetable oil spray is your friend—it helps the fingers crisp up faster. Pro tip: Pat the chicken dry before dredging, or the batter will turn into glue. And if you're feeling fancy, add a pinch of paprika to the breadcrumb mix for extra color and flavor.
These fingers are best served fresh out of the air fryer, but they reheat surprisingly well—just 3-5 minutes at 375°F to revive that crisp. Store leftovers in an airtight container for up to 3 days, though I can't promise they'll last that long. For game day or parties, double the batch—they disappear fast. The dipping sauce? Honey mustard or ranch are classics, but ketchup works too if you're keeping it simple. Make extra sauce—it's always gone first.
Why You'll Love This Recipe
- The secret’s in the air fryer: golden, shatteringly crisp outside while staying juicy inside. That Parmesan in the breadcrumbs? Adds a salty, umami punch that makes them irresistible.
- No-Fuss Coating: I swear by the three-step dip—flour, egg wash, then that crispy panko-Parmesan mix. No fancy techniques, just dunk and air-fry. Even my picky 10-year-old can help without making a mess.
- Crispy Yet Tender: The secret’s in the air fryer: golden, shatteringly crisp outside while staying juicy inside. That Parmesan in the breadcrumbs? Adds a salty, umami punch that makes them irresistible.
- Game for Any Meal: Pack them for lunch, serve with fries for game day, or toss into a salad for protein. Honestly, I’ve eaten them straight from the basket at midnight—no judgment here.
Step-by-step instructions for triple-crusted air fry chicken fingers
Here's how to create crispy, golden chicken fingers with a triple-layered coating in just 15 minutes.
Prepare the Chicken Tenders
Pat the 1.5 lb chicken tenders completely dry with paper towels. This step is crucial—any moisture will prevent the coating from sticking properly. Cut each tender into 1-inch strips if they're not already pre-cut. Arrange them on a plate and season lightly with 1 tsp salt and 1 tsp ground black pepper on both sides. I like to do this right before coating so the seasoning stays fresh and vibrant.
Place the seasoned strips on a wire rack set over a baking sheet. This keeps them elevated and prevents them from steaming, which would make the coating soggy. Let them sit at room temperature for 10 minutes while you prepare the coating station. This ensures even cooking and helps the coating adhere better.
Set Up the Triple-Coating Station
In a shallow bowl, combine the 0.5 cup all-purpose flour, 0.5 tsp garlic powder, and a pinch of salt. This light flour coating creates a base for the breading to stick. In a second bowl, beat the 2 whole large eggs until just combined but not frothy. In a third bowl, mix the 1.5 cups Japanese panko breadcrumbs with the 0.5 cup freshly grated Parmesan cheese and an extra pinch of pepper. This triple layer gives you that signature crunch.
I arrange the bowls in a triangle on my counter—flour first, then eggs, then panko mixture. This keeps everything organized and makes dipping quick and easy. Use a fork to hold each chicken strip while you dip it into the flour, then the egg wash, and finally the panko mixture. Press the panko firmly against the chicken so it sticks well. Let the coated strips rest on a wire rack for 5 minutes to help the coating set.
Preheat and Prepare the Air Fryer
Preheat your air fryer to 375°F for 5 minutes. This ensures the basket is hot and ready to cook when you add the chicken. While it's heating, lightly spray the air fryer basket with 2 tbsp vegetable oil spray, focusing on the bottom and sides. This prevents sticking and helps create that crispy exterior. I like to spray the basket after preheating so the oil doesn't burn before the chicken goes in.
Arrange the coated chicken strips in a single layer in the air fryer basket, leaving about ½ inch of space between each piece. Don't overcrowd the basket—this prevents steam buildup, which leads to soggy coatings. If you have more chicken than fits, cook in batches. The strips should fit snugly but not touch each other.
Air Fry to Perfect Crispiness
Cook the chicken fingers for 12 minutes, flipping them once halfway through at the 6-minute mark. This ensures even browning and crispiness on both sides. You'll know they're done when the edges are deep golden brown and the internal temperature reaches 165°F when checked with a meat thermometer. The coating should be crispy and crunchy, not soft or greasy.
If your air fryer runs hot, you might need to reduce the time slightly—watch closely after 10 minutes. Once done, transfer the chicken fingers to a wire rack to cool for 2-3 minutes. This resting period helps the coating set and makes them easier to handle. Serve immediately with the 0.5 cup dipping sauce of your choice for the ultimate experience.
Serve and Enjoy
Arrange the crispy chicken fingers on a serving platter and drizzle any leftover oil from the air fryer basket over the top for extra flavor. The golden-brown coating should be shattering with each bite, revealing juicy, tender chicken underneath. Serve with the optional 0.5 cup dipping sauce—honey mustard or ranch both pair perfectly with the savory, crispy fingers.
For best results, serve right away while the coating is at its crispiest. If you need to reheat leftovers, place them in the air fryer at 350°F for 2-3 minutes to restore that perfect crunch. These fingers are perfect for a quick weeknight dinner, game day snack, or even a fun kids' meal—everyone will love the triple-crusted crunch!
Pro Tips For Making Air Fry Chicken Fingers
- CRISP IN BATCHES: Use two air fryer cycles—never overcrowd the basket. I learned this the hard way when my first batch came out soggy because the chicken steamed instead of crisped. Cook half first, then flip and repeat.
- DRY THE CHICKEN: Pat those tenders thoroughly with paper towels before dredging—wet chicken = gluey coating. I skip the paper towel phase sometimes, and the panko just doesn’t stick right. Worth the extra 30 seconds.
- EGG WASH MATTERS: Whisk the eggs with a splash of milk (or water) to make them cling better to the flour. Cold eggs? Let them sit at room temp for 10 minutes—they’ll coat the chicken more evenly. Trust me, it’s noticeable.
- PREHEAT LIKE IT’S DEEP FRYING: Turn that air fryer to 400°F and let it scream for 5 minutes before adding the chicken. I used to skip this, and the first batch always felt undercooked while the second burned. Preheating guarantees that golden crust from the get-go.
Troubleshooting perfect results
Soggy Coating Fix
If your chicken fingers emerge with a soft, soggy coating, the issue is almost always moisture. Pat the chicken completely dry before coating—even a hint of dampness will prevent the breadcrumbs from sticking properly.
I also recommend letting the coated fingers rest on a wire rack for 5-10 minutes before air frying. This gives the coating time to set and reduces steam buildup during cooking. 💧
Uneven Cooking
Uneven browning or cooking often happens when the air fryer basket is overcrowded. Leave at least ½ inch between each finger to allow proper air circulation. If you're using a larger air fryer, cook in batches rather than forcing everything in at once.
I also suggest arranging the fingers in a single layer—this ensures even exposure to the hot air. 🌡️
Burnt Exterior
If your chicken fingers are turning too dark before they're fully cooked, try lowering the temperature to 350°F and increasing the cooking time by 2-3 minutes. Overcrowding or using too much oil spray can also cause excessive browning.
I recommend using a meat thermometer to check the internal temperature—it should reach 165°F for safe, juicy results. 🔥
Coating Falling Off
The triple-coating technique relies on each layer adhering properly. If the coating falls off, your chicken might be too wet or the coating wasn't pressed firmly enough. Press the panko mixture firmly against the chicken strips while coating, and ensure the egg wash is just combined—not frothy.
I also suggest using a wire rack to rest the coated fingers before air frying, which helps the coating set. 🍗
Undercooked Inside
If the chicken feels rubbery or undercooked, it likely didn't reach the proper internal temperature. Always use a meat thermometer to check for 165°F—guessing can lead to dry or unsafe results.
If your air fryer runs cooler, extend the cooking time by 1-2 minutes and flip the fingers more frequently. I also recommend starting with slightly thicker chicken strips for better doneness. 🌡️
Air Fryer Not Crispy Enough
For extra crispiness, spray the air fryer basket with vegetable oil spray before adding the chicken, focusing on the bottom and sides. If your fingers still lack crunch, try increasing the temperature to 390°F for the last 2 minutes of cooking.
I also suggest using Japanese panko—it's lighter and crisps up better than regular breadcrumbs. 🍞
Nutrition facts
Frequently asked questions
Can I use chicken breasts instead of tenders?
Yes, but you'll need to cut them into 1-inch strips and pound them to an even thickness (about ½-inch) for consistent cooking. Remove any large fat deposits first. The cooking time remains the same, but thinner pieces may crisp faster—watch closely after 10 minutes.
How do I keep the coating extra crispy?
For maximum crunch, use Japanese panko (not regular breadcrumbs) and press it firmly onto the chicken. Let the coated fingers rest on a wire rack for 5-10 minutes before air frying to set the coating. Spray the air fryer basket with vegetable oil spray before adding the chicken, and avoid overcrowding.
What's the best way to reheat leftovers?
Reheat in the air fryer at 350°F for 2-3 minutes—this restores crispiness without drying out the chicken. For the microwave, cover with a damp paper towel and heat for 15-20 seconds (they'll lose some crunch). Never reheat in the oven, as it makes the coating soggy.
Can I make these gluten-free?
Replace the flour with ½ cup gluten-free all-purpose flour and use gluten-free panko (or crushed cornflakes). The egg wash remains the same. The texture will be slightly different but still crispy. Always check labels to ensure all ingredients are certified gluten-free.
Why does my air fryer smoke when cooking?
Smoking usually means the oil spray is too hot or you're using too much. Reduce the temperature to 350°F and use just 1 tbsp oil spray (not the whole can). Let the air fryer preheat for 5 minutes before adding the chicken. If it still smokes, your air fryer may be too hot—try a different model or reduce the time slightly.