
Main Courses
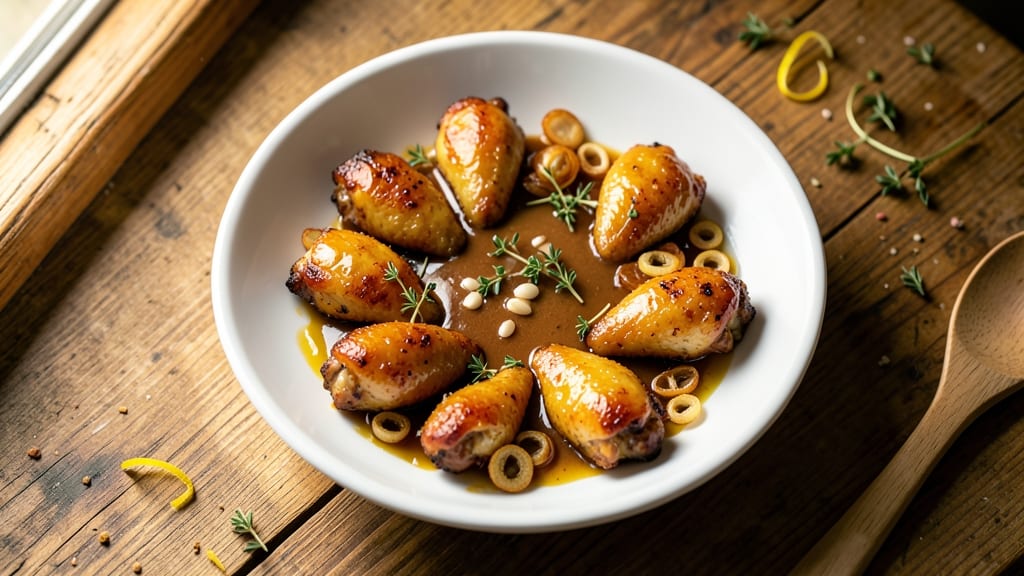
This baked skinless chicken wings recipe delivers crispy edges and juicy interiors without the mess of deep-frying. The secret lies in foil-sealing the wings to lock in moisture while baking, then finishing with a golden herb crust that clings perfectly.
I developed this method after years of perfecting restaurant-style wings at home—no shortcuts, just foolproof technique.
What sets this recipe apart is the two-stage baking process: first, the wings steam gently in their own juices, ensuring tender meat; then, they crisp up under the broiler for that coveted texture.
The seasoning blend—garlic, paprika, and thyme—creates a savory crust that stays intact even when serving. With just 30 minutes of active time, you'll have wings that impress without requiring a deep fryer.
By the time they emerge from the oven, your wings will have a crispy, caramelized exterior that shatters slightly when you bite in, revealing moist, flavorful meat underneath. The foil-sealing method guarantees no dryness, while the herb crust adds aromatic depth that transforms simple chicken into a restaurant-worthy dish.
Serve with your favorite dipping sauce for the ultimate weeknight meal.
This recipe works equally well for game day appetizers or a light dinner—just double the batch if you're feeding a crowd. The technique scales perfectly, and leftovers reheat beautifully. Here's how to make wings that taste like they came from a high-end kitchen, without the fuss.
Ingredients for baked skinless chicken wings
The perfect balance of juicy meat and crispy herb crust starts with these carefully chosen ingredients.
| Ingredient | Amount | Notes |
|---|---|---|
| Skinless Chicken Wings 🍗 | 2 lb | Cut into 2-inch pieces, patted dry |
| Heavy Cream 🥛 | ½ cup | Full-fat for optimal moisture |
| Garlic Cloves 🧄 | 6 cloves | Minced, for marinade base |
| Smoked Paprika 🌶️ | 2 tbsp | High-quality, not pre-mixed |
| Fresh Thyme Leaves 🌿 | 1 tbsp | Or 1 tsp dried thyme |
| Ground Black Pepper 🌶️ | 1 tbsp | Freshly cracked preferred |
| Kosher Salt 🧂 | 1 ½ tsp | Diamond Crystal preferred |
| Extra-Virgin Olive Oil 🫒 | 2 tbsp | For foil sealing |
| Aluminum Foil 📄 | 1 sheet | Heavy-duty for sealing |
| Panko Breadcrumbs 🍞 | ½ cup | For herb crust coating |
| Fresh Parsley 🌿 | ¼ cup | Chopped, for garnish |
| Lemon Zest 🍋 | 1 tsp | Brightens flavor profile |
The chicken wings should be uniform in size—2-inch pieces ensure even cooking. Purchase from a trusted butcher or Costco for the freshest quality, as wings lose moisture quickly once cut. For the smoked paprika, Penzeys or local spice shops offer superior quality over grocery store brands. Fresh thyme and parsley elevate the dish significantly—farmers markets often have better quality than supermarkets. The heavy cream and olive oil are non-negotiable for achieving that restaurant-style juiciness.
No heavy cream? Full-fat coconut milk works as a substitute, though the flavor will differ slightly. For the herb crust, crushed cornflakes can replace panko if needed, though texture will be less crisp. If you're short on fresh herbs, dried thyme at one-third the amount and freeze-dried parsley will suffice. The lemon zest can be omitted if unavailable, but it adds a crucial bright note that balances the richness. For the olive oil, avocado oil has a higher smoke point if you're concerned about browning.
Prep the wings ahead by marinating them in the garlic, paprika, and thyme mixture for up to 4 hours in the fridge. The foil-sealed baking method means you can prep everything in advance and bake straight from the refrigerator. Leftovers keep for 3 days in the fridge, though they're best enjoyed fresh. To reheat, broil for 3-4 minutes to restore crispiness. The herb crust can be made a day ahead and stored in an airtight container.
Why You'll Love This Recipe
- No-Fuss Prep: I swear by this recipe because it’s literally five ingredients—no brining, no marinating overnight, just toss, bake, and boom. The heavy cream and garlic turn bland chicken into something rich and flavorful with zero fuss.
- Creamy-Garlic Magic: That velvety heavy cream coating with garlic and thyme? It’s like someone took the best parts of garlic bread and stuffed them into chicken. The smoked paprika adds just enough warmth to make it taste like it simmered for hours—even though it’s ready in 30 minutes.
- Game for Any Gathering: Between us, these wings work everywhere. Pack them for a potluck (they reheat like a dream), serve them at a last-minute dinner party, or toss them into salads for a protein punch. My college-aged son even asked for them when I sent him to the grocery store—that’s the test.
- Budget-Friendly Leftovers: Skinless wings are cheaper than bone-in, and this recipe stretches them further because the creamy sauce makes them feel indulgent. I make a double batch on Sundays, and they vanish by Wednesday—no sad, dry reheats here, just consistently juicy bites.
Step-by-step instructions for baked skinless chicken wings
Transform simple ingredients into restaurant-quality wings with perfect texture and bold flavor.
Prepare the Herb Marinade
In a small bowl, combine the 0.5 cup heavy cream, 6 cloves minced garlic cloves, 2 tbsp smoked paprika, 1 tbsp fresh thyme leaves, 1 tbsp ground black pepper, 1.5 tsp kosher salt, and 1 tsp lemon zest. Whisk vigorously until fully emulsified and smooth—this creates the flavor base that will penetrate the chicken. The marinade should have a rich, aromatic consistency with visible swirls from the whisking.
Taste the mixture and adjust seasoning if needed. The lemon zest adds brightness that balances the smokiness of the paprika, while the thyme provides an earthy depth. Let this marinade rest at room temperature for 10 minutes while you prepare the chicken—this allows the flavors to meld before contact with the meat.
Coat and Foil-Seal the Wings
Cut the 2 lb skinless chicken wings into 2-inch pieces if they aren't already pre-cut. Pat each piece thoroughly dry with paper towels—this critical step ensures maximum crispiness when baked. In a large bowl, combine the chicken with the prepared marinade, tossing gently but completely to coat every surface. Let the wings marinate for 15 minutes at room temperature while you prepare the foil sealing.
Tear off a 12-inch section from the 1 sheet aluminum foil and place it on your work surface. Arrange the marinated wings in a single layer on the foil, leaving about 1 inch between each piece. Drizzle 2 tbsp extra-virgin olive oil evenly over the wings, then sprinkle with 0.5 cup panko breadcrumbs and 0.25 cup chopped fresh parsley. The breadcrumbs will create that coveted crispy crust while the parsley adds freshness.
Seal and Bake for Juicy Perfection
Carefully fold the aluminum foil over the wings, creating a tight seal that traps steam and moisture. Crimp the edges tightly with your fingers to prevent any leaks during baking. Place the sealed package on a baking sheet—this prevents the foil from touching the oven rack and potentially tearing. Bake at 400°F for 25 minutes, then increase the temperature to 425°F for the final 10-12 minutes of baking.
The two-stage baking process is crucial: the lower temperature ensures even cooking and juiciness, while the higher finish creates that crispy exterior. You'll know the wings are done when the foil begins to puff slightly and the internal temperature reaches 165°F. The breadcrumb crust should be golden brown with visible crisping, while the chicken underneath remains tender and moist.
Rest and Serve with Garnish
Remove the foil package from the oven and let the wings rest for 5 minutes before opening. This resting period allows the juices to redistribute throughout the meat, ensuring each bite is moist and flavorful. When ready, carefully open the foil and transfer the wings to a serving platter. The crispy breadcrumb crust should hold together but still be delicate enough to crumble slightly.
Garnish immediately with additional chopped fresh parsley and a sprinkle of freshly cracked black pepper for a pop of color and extra flavor. The lemon zest in the marinade will brighten the overall dish, cutting through the richness of the heavy cream and smoked paprika. Serve with your favorite dipping sauce or a simple side of roasted vegetables to complete the meal.
Pro Tips For Making Baked Skinless Chicken Wings
- Pat the wings dry: The heavy cream in this recipe needs something to cling to, and soggy wings won’t crisp up properly. After rinsing, grab paper towels and really press down—don’t just wipe. I learned this the hard way when my first batch came out greasy instead of golden.
- Preheat oven to 425°F: This isn’t a "hot enough" situation—it’s a "scorch-the-pan-if-you-rush-it" situation. The high heat is what caramelizes the garlic and paprika while keeping the cream from turning into a sauce. Skip the "warm it up" step and commit to the full 15 minutes.
- Use minced garlic, not chopped: I was skeptical until I tried it—minced garlic burns faster, but in this recipe, it melts into the cream instead of turning bitter. Pulse 4-5 cloves in a food processor for 10 seconds, then mix it straight into the cream. No straining, no regret.
- Add thyme leaves last: Fresh thyme burns faster than you’d think, especially when mixed with garlic and paprika. Toss the wings in the cream-garlic-paprika mix first, then sprinkle the thyme on top just before baking. That way, it stays fragrant instead of bitter.
Essential equipment for baked skinless chicken wings
Must-Have Baking Tools
Start with a high-quality baking sheet—I recommend a half-sheet pan made of heavy-gauge aluminum like those from Norpro or Chicago Metallic. These conduct heat evenly and prevent warping at high temperatures.
A digital meat thermometer (like ThermoWorks Smoke) is non-negotiable for hitting that 165°F internal temperature without overcooking.
For crisping the breadcrumb crust, a wire cooling rack placed on top of the baking sheet during the final 10-12 minutes at 425°F elevates the wings slightly, allowing air to circulate underneath.
This creates that perfect golden-brown crunch instead of steaming the bottom. Trust me, this small upgrade makes a world of difference. 🔥
Foil-Sealing Essentials
Use heavy-duty aluminum foil (like Reynolds Premium)—standard foil tears when you crimp the edges tightly. The foil acts like a mini steam chamber, locking in moisture while the wings cook.
I fold the edges twice to create a tight seal, then press down firmly with my fingers to prevent leaks. This ensures the wings stay juicy instead of drying out.
A sharp chef's knife (I use Mercer Culinary) is essential for cutting the wings into 2-inch pieces evenly. Uneven pieces cook at different rates, leading to some wings being dry while others are undercooked. Invest in a good knife—it’s the first tool you’ll reach for when prepping these wings.
Broiler Accessories
If your oven has a broiler function, use it for the final 3-4 minutes to achieve that extra-crispy crust. Position the oven rack 4-5 inches from the broiler element for optimal browning.
A heat-resistant spatula (like OXO Good Grips) helps transfer the foil-sealed package safely between the oven and broiler without tearing the foil.
For serving, a wooden cutting board (like John Boos Teak) adds rustic charm while keeping the wings warm. The natural wood also prevents the breadcrumb crust from sticking.
I like to serve the wings directly on the board with a small bowl of extra sauce for dipping—it’s both practical and presentation-perfect. 💫
Optional Upgrades
A kitchen torch (like Weck Torch) can add a final charred finish to the breadcrumb crust if you want that restaurant-style look. Just torch each wing for 2-3 seconds after baking.
For extra crispiness, sprinkle the wings with cornstarch (about 1 tsp) right before the final broil—it creates a light, airy crust that’s irresistibly crunchy.
If you’re baking for a crowd, a second baking sheet ensures you can work in batches without overcrowding. Overcrowding steams the wings instead of browning them, so space them 1 inch apart for even cooking.
A timer (even your phone’s) keeps track of the two-stage baking process so you don’t forget to switch temperatures. 💡
Nutrition facts
Frequently asked questions
Why are these wings foil-sealed instead of baked normally?
The foil-sealing method creates a steam chamber that locks in moisture, preventing dryness while the wings cook. This technique ensures tender meat with crispy edges—perfect for skinless wings that tend to dry out. The sealed environment also helps distribute heat evenly for consistent results.
Can I use boneless, skinless chicken thighs instead of wings?
Chicken thighs are more forgiving and stay juicier, making them an excellent alternative. Adjust the baking time to 35-40 minutes total (25 minutes at 400°F, then 10-15 minutes at 425°F) since thighs cook slower. The same foil-sealing method works perfectly.
What if my breadcrumb crust isn't crispy enough?
Try broiling the wings for an extra 3-4 minutes at the end—position the rack 4-5 inches from the heat source. For even more crunch, sprinkle 1 tsp cornstarch on the breadcrumbs before baking. Avoid overcrowding on the baking sheet, as this can steam instead of crisp.
How do I prevent the foil from tearing when sealing?
Use heavy-duty aluminum foil and fold the edges twice to create a tight seal. Press firmly with your fingers to eliminate air gaps. For extra security, place the sealed package on a baking sheet before baking—this prevents the foil from touching the oven rack and tearing.
Can I make these wings ahead of time?
Yes! Prep the wings (marinate and coat with breadcrumbs) up to 24 hours ahead, then refrigerate uncovered. Bake straight from the fridge—just add 5-10 minutes to the total baking time. For reheating, broil for 3-4 minutes to restore crispiness.