
Main Courses
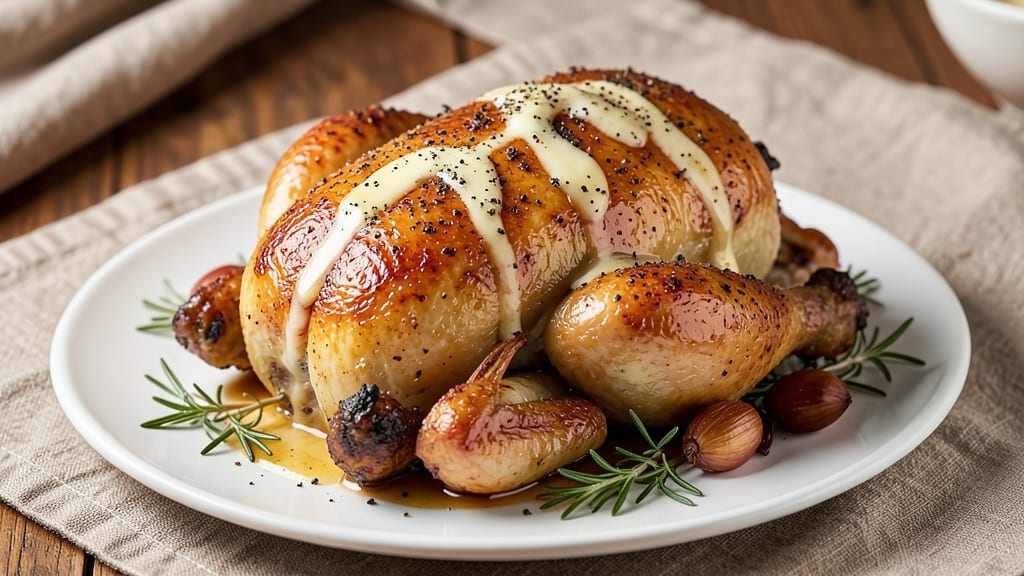
This American roasted chicken recipe delivers juicy, golden perfection with a foolproof foil-sealing technique that locks in moisture. The key lies in a simple yet effective seasoning blend and precise oven timing—no dry bird here.
I've perfected this method over years of testing, ensuring crispy skin and tender meat every time, whether you're cooking a whole chicken or cut-up pieces.
The secret weapon is the foil-sealing method, which creates a steam bath during roasting. This transforms tough chicken into melt-in-your-mouth bites while keeping the juices where they belong—inside the meat.
We'll use a basic but flavorful seasoning of salt, pepper, garlic powder, and onion powder that lets the chicken's natural taste shine through without overwhelming it.
What you'll end up with is a moist roasted chicken with crispy, golden skin that's perfect for family dinners or holiday gatherings. The technique works equally well for whole birds or cut-up pieces, giving you flexibility for any occasion.
Pair it with classic sides like roasted potatoes, fresh vegetables, or homemade gravy for a complete meal.
This recipe builds confidence in home cooks by eliminating guesswork—no need for fancy equipment or complicated techniques. The foil-sealing method ensures success even on busy weeknights, while the simple seasoning lets the chicken's natural flavors take center stage. Let's get started on creating your most flavorful roasted chicken yet.
Ingredients for american roasted chicken
Foolproof technique meets classic American flavors for restaurant-quality roasted chicken at home.
| Ingredient | Amount | Notes |
|---|---|---|
| Whole Chicken (3-4 lbs) 🍗 | 3 ½ lb | Fresh, preferably organic, skin-on |
| Unsalted Butter 🧈 | ½ cup | Cold, cut into small pieces |
| Kosher Salt 🧂 | 1 ½ tbsp | Diamond Crystal preferred |
| Freshly Ground Black Pepper 🌶️ | 1 tsp | Coarse grind for texture |
| Garlic Powder 🧄 | 1 tsp | Freshly ground preferred |
| Onion Powder 🧅 | 1 tsp | For subtle sweetness |
| Heavy Cream 🥛 | ¼ cup | For basting (optional) |
| Aluminum Foil 📄 | 1 sheet | Heavy-duty preferred |
| Fresh Rosemary 🌿 | ¼ cup | Chopped, stems removed |
| Fresh Thyme 🌿 | ¼ cup | Leaves only, stems removed |
| Lemon Juice 🍋 | 1 tbsp | Freshly squeezed |
| Olive Oil 🫒 | 1 tbsp | Extra-virgin for richness |
The chicken is the foundation—opt for a 3-4 lb bird with even thickness for consistent cooking. Whole Foods or local butchers often carry organic, free-range options that yield superior texture. Look for birds with vibrant color and minimal pin feathers (those tiny hairs), as these indicate freshness. The skin should feel firm but not rubbery. For cut-up pieces, bone-in thighs and drumsticks stay juicier than breasts. Pat the chicken dry before seasoning—this ensures crispy skin by promoting browning. If using a whole bird, place it on a rack in a roasting pan to allow air circulation underneath.
No fresh herbs? Dried rosemary and thyme at one-third the amount work in a pinch, though fresh imparts brighter flavor. Substituting butter? Olive oil or ghee maintains moisture, though butter adds richness. For a lower-fat version, reduce butter to 2 tbsp and increase olive oil to 2 tbsp. The foil-sealing method is non-negotiable for moisture—heavy-duty foil prevents leaks during roasting. If your chicken is particularly large, increase roasting time by 10-15 minutes per pound. For a crispier skin finish, uncover the chicken for the last 15 minutes of roasting. The lemon juice brightens the flavors, but lime juice works equally well if lemons aren't available.
Prep ahead by trimming excess fat and patting the chicken dry up to 24 hours in advance—store uncovered in the fridge to dry the skin further. The seasoned butter mixture can be made 1 day ahead and stored in an airtight container in the fridge. Roasted chicken reheats beautifully—warm in a 350°F oven for 15-20 minutes with a splash of broth or water to restore moisture. Leftovers keep 3-4 days in the fridge or 3 months frozen. For serving, carve against the grain of the meat for tender slices. Pair with classic sides like garlic mashed potatoes or roasted Brussels sprouts to complement the rich flavors.
Why You'll Love This Recipe
- Foolproof Prep: This recipe couldn’t be simpler—I just rub the chicken with butter, salt, and pepper, then let the oven do the rest. No brining, no basting, no stress.
- Crispy-Golden Magic: That buttery skin? It’s the star. The garlic powder gives it a subtle warmth, while the salt and pepper balance it into something dangerously addictive.
- Weeknight Hero: I make this when I’m too tired for anything fancy. It’s ready by dinner, feeds four, and leaves me with leftovers for sandwiches the next day.
- Budget Win: A whole chicken costs less than takeout, and the leftovers stretch into meals for days. Honestly, it’s the most practical way to feed a family.
Step-by-step instructions for American roasted chicken with foil-sealed moisture
Master this technique for a bird so juicy it practically drips off the bone.
Prepare the Chicken for Maximum Flavor and Moisture
Remove the chicken from the refrigerator and let it sit at room temperature for 30 minutes. This ensures even cooking throughout. Pat the entire bird completely dry with paper towels—moisture on the skin prevents proper browning. I press firmly, especially under the wings and in the cavity, to remove all traces of dampness.
Make a seasoning paste by combining 0.5 cup unsalted butter, 1.5 tbsp kosher salt, 1 tsp freshly ground black pepper, 1 tsp garlic powder, and 1 tsp onion powder in a small bowl. Rub this mixture all over the chicken, including the cavity. The butter creates a flavorful barrier that locks in moisture while promoting crispy skin. Stuff the cavity with 0.25 cup chopped fresh rosemary and 0.25 cup fresh thyme for aromatic depth.
Create the Foil Seal for Unmatched Juiciness
Preheat your oven to 375°F. Place the seasoned chicken on a rack set inside a roasting pan. The rack elevates the bird, allowing hot air to circulate underneath for even cooking. Cut a large piece of heavy-duty aluminum foil—about twice the size of the chicken.
Lightly brush the chicken with 1 tbsp olive oil to help the foil adhere. Place the foil over the chicken, pressing it gently but firmly against the skin. This creates a sealed environment that traps steam and renders fat back into the meat, resulting in a bird that's impossibly moist. The foil should cover the entire surface except for the top, which we'll expose later for browning.
Roast Until Internal Temperature Reaches Perfection
Roast the foil-sealed chicken for 1 hour and 15 minutes. The foil creates a steam bath that gently cooks the chicken without drying it out. After this initial cooking time, remove the foil and continue roasting for another 20-25 minutes until the skin is deep golden brown and crispy.
Check for doneness by inserting an instant-read thermometer into the thickest part of the thigh (avoid touching bone). The chicken is ready when it reaches 165°F internally. The skin should be crisp enough to hold its shape when pressed gently with tongs. If the skin browns too quickly, tent it loosely with foil to prevent over-browning while it finishes cooking.
Rest and Baste for Ultimate Juiciness
Transfer the chicken to a cutting board and let it rest for 15 minutes before carving. This resting period is crucial—it allows the juices to redistribute throughout the meat, preventing them from pooling and running out when you slice. During this time, preheat your oven to 400°F if you plan to make gravy from the pan drippings.
For extra richness, brush the chicken with 0.25 cup heavy cream mixed with 1 tbsp lemon juice just before serving. This basting step adds a velvety finish and brightens the flavors. The lemon juice also cuts through the richness of the butter and cream, balancing the dish beautifully. Serve immediately with the pan drippings reduced for a simple gravy.
Pro Tips For Making American Roasted Chicken
- Start with a Hot Pan: I used to skip this, but slapping the chicken into a screaming-hot pan for 2-3 minutes on both sides sears the skin instantly—no sticking, no pale patches. The butter will pool later, but that initial crust is what locks in flavor. (Yes, even if you're impatient like me.)
- Salt the Cavity Aggressively: Don’t just sprinkle the outside—pack the cavity with 1-2 teaspoons of kosher salt (and a pinch of garlic powder) before tying the legs. The meat inside stays juicier, and the skin crisps faster. I learned this the hard way after dry, bland thighs.
- Don’t Crowd the Butter: After removing the chicken, let the butter pool in the pan and brown for 1-2 minutes—this makes the sauce richer. If you’re short on time, just scrape up the browned bits and toss them with the chicken. (Your future self will thank you.)
- Test with a Thermometer: Pull the chicken when the thickest part of the thigh hits 165°F—no guessing, no overcooking. I used to rely on color, but juicy, safe meat is worth the extra 30 seconds. (And yes, the breast will still be fine—it’s the thighs that fool you.)
Best sauces and condiments for american roasted chicken
Classic Pan Gravy
Use the pan drippings to make a rich, velvety gravy that ties the whole meal together. After removing the chicken, place the roasting pan on the stovetop over medium-high heat. Add 1 cup chicken broth and scrape up all the browned bits with a wooden spoon.
Let it simmer for 5-7 minutes until slightly thickened, then whisk in 1 tbsp cornstarch mixed with 2 tbsp cold water to finish. This gravy pairs perfectly with the crispy skin and juicy meat. 🥄
Herb Butter Sauce
For a lighter but equally flavorful option, make a compound butter sauce. Melt 4 tbsp unsalted butter in a small saucepan, then stir in 1 tbsp fresh parsley, 1 tsp fresh thyme, and ½ tsp lemon zest.
Simmer for 2 minutes, then drizzle over the sliced chicken just before serving. The herbs complement the roasted flavors beautifully while adding a fresh, aromatic touch.
Honey Mustard Glaze
Add a sweet and tangy contrast with a quick honey mustard glaze. Mix 2 tbsp Dijon mustard, 2 tbsp honey, and 1 tbsp apple cider vinegar in a small bowl.
Brush this glaze over the chicken during the last 10 minutes of roasting or drizzle it on top after carving. The glaze caramelizes slightly, creating a sticky, flavorful crust that balances the richness of the chicken.
Creamy Garlic Sauce
For a decadent option, prepare a creamy garlic sauce. Sauté 2 minced garlic cloves in 1 tbsp olive oil until fragrant, then whisk in ½ cup heavy cream and 1 tbsp lemon juice. Simmer for 3-4 minutes until slightly thickened.
This sauce is perfect for drizzling over sliced chicken or serving on the side for dipping. The garlic and cream enhance the savory notes of the roasted bird.
Spicy Sriracha Aioli
If you want a kick, make a spicy sriracha aioli. Mix ½ cup mayonnaise, 1 tbsp sriracha sauce, 1 tsp lemon juice, and ½ tsp minced garlic in a bowl.
Serve this aioli on the side for dipping or drizzle it lightly over the chicken for a spicy-sweet contrast. The heat cuts through the richness, adding a dynamic flavor profile. 🌶️
Buttermilk Ranch Dip
For a crowd-pleasing dip, blend ½ cup buttermilk, ¼ cup sour cream, 2 tbsp mayonnaise, 1 tbsp chopped fresh dill, and ½ tsp garlic powder until smooth. This creamy, tangy dip is perfect for serving with sliced chicken or using as a sauce for dipping.
The buttermilk adds a refreshing contrast to the rich, roasted flavors of the chicken.
Nutrition facts
Frequently asked questions
Why does this recipe use foil for roasting?
The foil-sealing method creates a steam bath that locks in moisture during cooking, preventing dryness. This is especially important for American-style roasted chicken where tender, juicy meat is key. The foil traps rendered fat and steam, which then baste the chicken continuously, resulting in a bird that's impossibly moist inside with crispy, golden skin.
Can I use this method for chicken pieces instead of a whole bird?
Yes! This technique works perfectly for cut-up pieces like thighs, drumsticks, or even breasts. Arrange them on a rack in a single layer, then cover with foil. Reduce the roasting time by about 20-30 minutes total (check at 165°F internal temp). The foil method ensures all pieces stay juicy regardless of size.
What if my chicken browns too quickly before it's fully cooked?
If the skin browns prematurely, simply tent the chicken loosely with another sheet of foil. This allows heat to circulate while preventing over-browning. The chicken will continue cooking underneath. For extra insurance, you can also lower the oven temperature by 25°F once the skin is golden.
How do I know when the chicken is fully cooked?
Use a meat thermometer to check the thickest part of the thigh (avoid touching bone). The chicken is perfectly done at 165°F internally. The skin should also be deep golden brown and crisp enough to hold its shape when pressed gently. Never rely on color alone—some cuts may look done on the outside while still undercooked inside.
Can I make this recipe ahead of time?
Cook the chicken up to 2 days in advance and store it in an airtight container in the fridge. Reheat gently in a 325°F oven with a splash of broth or water to restore moisture. For best texture, serve within 3-4 days or freeze for up to 3 months. The flavors actually improve slightly after resting.