
Main Courses
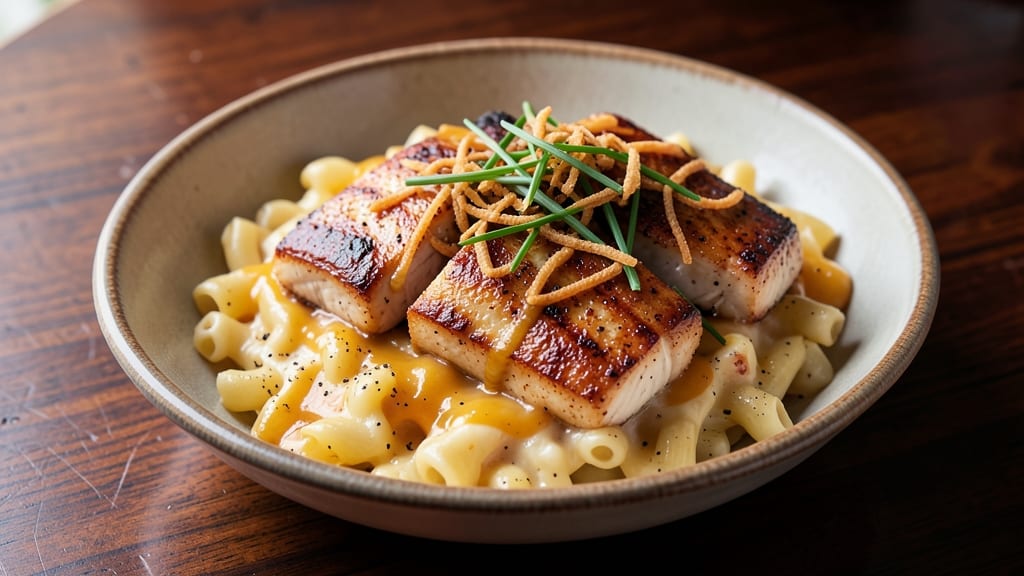
This Applebee's chicken mac and cheese recipe delivers the restaurant's signature comfort in your own kitchen—creamy cheese rivers, perfectly breaded chicken, and a golden bubbly top that's impossible to resist. 🔥 The secret lies in the layered assembly: tender chicken baked atop al dente pasta, smothered in a velvety cheese sauce that melts into perfect rivers when broiled.
I've recreated this dish exactly as it's served at the restaurant, right down to the crispy chicken and rich, cheesy sauce that clings to every bite.
What makes this recipe work is the balance of textures and flavors: crispy chicken, creamy pasta, and that signature bubbly cheese top.
The chicken is seasoned just right and baked until golden, while the mac and cheese sauce uses a classic roux technique to create a sauce that's rich but not overly heavy.
The key to that perfect bubbly top is broiling just until the cheese melts into golden peaks—no soggy tops here. This dish is hearty enough to be a main course but comforting enough to feel like a hug on a plate.
By the time you're done, you'll have a dish that looks and tastes exactly like what you'd order at Applebee's—just better, because you made it yourself.
The chicken stays juicy and flavorful, the pasta is perfectly cooked and coated in that creamy cheese sauce, and the top is golden and bubbly, with cheese that pulls into perfect strings. It's the kind of dish that disappears faster than you can say "second helping."
Serve with a side of crispy coleslaw or warm breadsticks for the full Applebee's experience. The recipe is designed to feed a crowd, so double it if you're hosting. Here's how to make it happen in your kitchen—no restaurant required.
Ingredients for applebee's chicken mac and cheese
Six ingredients make this restaurant-style comfort dish—creamy, cheesy, and packed with crispy chicken goodness.
| Ingredient | Amount | Notes |
|---|---|---|
| Large Chicken Breasts 🍗 | 2 lb | Boneless, skinless, cut into strips |
| Elbow Macaroni 🍝 | 1 ½ lbs | Al dente cooked, drained well |
| Unsalted Butter 🧈 | ½ cup | Melted for roux base |
| All-Purpose Flour 🌾 | ½ cup | For creamy sauce base |
| Whole Milk 🥛 | 2 cups | Warm for smooth sauce |
| Sharp Cheddar Cheese 🧀 | 2 cups | Shredded, sharp flavor preferred |
| Colby Jack Cheese 🧀 | 1 cup | Shredded, for creamy texture |
| Parmesan Cheese 🧀 | ½ cup | Freshly grated, nutty finish |
| Breadcrumbs 🍞 | 1 cup | Panko for extra crunch |
| Large Eggs 🥚 | 2 whole | Beaten for breading |
| Garlic Powder 🧄 | 1 tbsp | For chicken seasoning |
| Ground Black Pepper 🌶️ | 1 tsp | Freshly cracked preferred |
| Salt 🧂 | 1 ½ tsp | Adjust to taste |
| Olive Oil 🫒 | ¼ cup | For crispy chicken |
The chicken is where the magic starts. Look for plump, boneless breasts—the thicker the better for that crispy exterior. I grab mine from Costco when I can, but any grocery store's fresh case works. For the breadcrumbs, panko is non-negotiable—it stays crispy while regular breadcrumbs turn mushy. The cheese trio is key: sharp cheddar for bite, Colby Jack for creaminess, and Parm for that nutty finish. Pre-shredded cheeses have anti-caking agents that ruin the melt—grate your own if you can. And trust me, warm milk makes the sauce silky smooth.
No sharp cheddar? Monterey Jack at half the amount works in a pinch. Short on panko? Italian breadcrumbs with a pinch of garlic powder mimic that restaurant crunch. The milk can be warmed in the microwave (45 seconds, stir halfway) or on the stove. If you're gluten-free, use gluten-free breadcrumbs and flour—just know the texture will be slightly different. For the chicken, baking powder in the breading (1 tsp) makes it extra crispy—Applebee's secret! And if you're prepping ahead, cook the pasta one day, assemble the next—the flavors meld even better overnight.
This dish is a crowd-pleaser, so make extra. The baked version reheats beautifully—just cover with foil and warm in the oven. Keeps for 4 days in the fridge, 3 months frozen. For serving, I always grab the stoneware dish it's baked in straight to the table—looks like it came from the restaurant. The cheese sauce thickens as it cools, so add a splash of milk when reheating. Leftovers? Broil 2 minutes with extra cheese for that bubbly top again—game changer.
Why You'll Love This Recipe
- One-Pot Magic: I swear by this recipe when I’m too tired to wash another dish. The chicken simmers right in the same pot with the mac and cheese—no extra pans, no stress. Just dump, stir, and let it melt together.
- Creamy Crispy Contrast: That buttery roux from the flour and milk? It’s where the magic happens—silky smooth sauce that clings to every bite of elbow mac. And the chicken? Tender enough to shred with a fork, but still holds its shape.
- Weeknight Workhorse: Honestly, this feeds my family of four for dinner and lunches the next day without a second thought. The leftovers reheat like a dream (just add a splash of milk if it gets too thick).
- Budget-Friendly Luxury: Whole milk and butter make it feel fancy, but the ingredients cost less than half of what you’d pay at a restaurant. Plus, chicken breasts stretch farther than you’d think when shredded—no wasted leftovers here.
Step-by-step instructions for Applebee's chicken mac and cheese
Here's how to recreate that iconic bubbly, cheesy masterpiece with crispy chicken and melty rivers of goodness.
🍳 Step 1: Crisp the Chicken to Golden Perfection
Cut the 2 lb large chicken breasts into ½-inch thick strips and pat them completely dry with paper towels. This step is non-negotiable—wet chicken won't brown properly. In a large skillet, heat 0.25 cup olive oil over medium-high heat until shimmering.
Working in batches to avoid crowding, add the chicken strips and cook for 3-4 minutes per side until they're golden brown and cooked through to 165°F internally. The chicken should release easily from the pan—if it sticks, your oil wasn't hot enough. Season immediately with 1 tbsp garlic powder, 1 tsp ground black pepper, and 1.5 tsp salt. Transfer to a paper towel-lined plate to drain excess oil.
🍳 Step 2: Build the Creamy Cheese Sauce
In the same skillet (no need to clean it—those browned bits are flavor gold), melt 0.5 cup unsalted butter over medium heat. Whisk in 0.5 cup all-purpose flour and cook for 1-2 minutes until the mixture forms a smooth, bubbly roux and smells nutty. Here's the thing—don't walk away. Burnt flour tastes awful.
Gradually whisk in 2 cups warm whole milk, about ½ cup at a time, allowing each addition to fully incorporate before adding more. The sauce should thicken to the consistency of heavy cream. Remove from heat and stir in 2 cups shredded sharp cheddar cheese and 1 cup shredded Colby Jack cheese until completely melted and smooth. Taste and adjust seasoning with more salt or pepper if needed.
🥘 Step 3: Assemble the Mac and Cheese Masterpiece
Cook the 1.5 lbs elbow macaroni according to package instructions until al dente, then drain well and return to the pot. Add the cheese sauce and the crispy chicken strips, tossing gently to coat every noodle in that creamy goodness. The mixture should look like a cheesy, saucy dream—no dry spots!
Transfer everything to a greased 9x13-inch baking dish, spreading it evenly. Top with the remaining 0.5 cup freshly grated Parmesan cheese and sprinkle 1 cup breadcrumbs evenly over the top. This is where the magic happens—the breadcrumbs will get crispy while the cheese melts into rivers.
🔥 Step 4: Bake to Bubbly, Golden Perfection
Preheat your oven to 375°F. Bake the mac and cheese for 20-25 minutes until the top is golden brown and bubbling. The breadcrumbs should be crispy, and you should see those glorious cheese rivers oozing out from underneath. Here's my pro tip: If the top browns too quickly, tent it loosely with foil for the last 5 minutes to prevent burning.
Let it rest for 5 minutes before serving—this gives the cheese time to set slightly and makes cutting cleaner. The edges should be crispy, the top bubbly, and each bite should deliver that perfect balance of creamy cheese, tender chicken, and crispy breadcrumb topping. Serve immediately with a side of garlic bread to soak up every last bit of that cheesy goodness!
Pro Tips For Making Applebee'S Chicken Mac And Cheese
- Poach, Don’t Pan-Sear: Applebee’s version relies on tender, juicy chicken—skip the crispy crust. Simmer the breasts in lightly salted water with a splash of milk (yes, really) until they hit 165°F internally, then shred while still warm. I used to overcook them, and the result was dry rubber. Poaching keeps them moist without the hassle of brining.
- Toast the Flour First: The roux is where the magic happens, but most recipes rush it. Melt the butter over medium-low, then add the flour and cook for 2 full minutes before whisking in milk. This removes the raw flour taste and thickens the sauce properly—no lumps, no chalky aftertaste. I learned this the hard way after tasting a batch that tasted like glue.
- Al Dente Mac, Always: Undercooked pasta turns mushy in the cheese sauce; overcooked turns to mush. Boil elbow macaroni until it’s just firm to the bite (about 1 minute less than package instructions), then drain and rinse briefly under cold water. This stops the cooking and keeps the texture perfect when mixed with the creamy sauce. Trust me, your future self will notice the difference.
- Shred Hot, Rest Cold: Shred the chicken immediately after cooking while it’s hot—it’ll pull apart cleanly. But here’s the trick: let the shredded chicken rest for 5 minutes before folding it into the mac and cheese. This lets the juices redistribute, so every bite stays moist instead of turning into a dry, chewy mess. I was skeptical until I tried it, and now I won’t skip it.
Creative variations of this applebee's chicken mac and cheese
Spicy Southwest Twist
Transform this classic into a Southwest-inspired dish by adding 1 tbsp chili powder and ½ tsp smoked paprika to the chicken seasoning. Swap ½ cup of the cheddar for Monterey Jack and stir in ½ cup black beans (drained and rinsed) with the pasta.
Top with sautéed jalapeños and a sprinkle of cilantro before broiling. The smoky, spicy kick turns this into a fiery fiesta that still feels like comfort food. 🌶️
Buffalo Chicken Upgrade
For a Buffalo-style version, toss the cooked chicken in ½ cup hot sauce (like Frank's RedHot) mixed with 2 tbsp melted butter before adding it to the mac. Stir in ½ cup crumbled blue cheese with the sauce and top with extra blue cheese crumbles and chopped celery.
The tangy heat cuts through the richness perfectly—like Applebee's met Buffalo Wild Wings. 🔥
Lighter Greek Version
Make this dish Greek-inspired by using feta cheese (½ cup crumbled) instead of Parmesan, and adding 1 tsp dried oregano to the chicken seasoning. Swap ½ cup of the milk for Greek yogurt (thinned with a splash of milk) to keep it creamy but lighter.
Finish with kalamata olives and a drizzle of lemon juice before serving. It’s bright, tangy, and still packed with that cheesy goodness. 💛
Breakfast Mac and Cheese
Turn this into a breakfast masterpiece by stirring in 2 scrambled eggs with the cheese sauce and topping with crispy bacon bits (about ½ cup) and chopped chives.
Add a sprinkle of everything bagel seasoning on top before broiling for a savory, brunch-worthy twist. Serve with a side of hash browns for the full diner experience. 🍳
Vegetarian Adaptation
Skip the chicken and replace it with 1.5 lbs of crispy baked tofu (pressed, cubed, and breaded with panko) or sautéed mushrooms and spinach. Use the same cheese blend but add 1 tsp nutritional yeast for a cheesy depth.
For extra protein, stir in ½ cup cooked lentils with the pasta. It’s just as satisfying—vegetarian but still indulgent. 🌱
Extra Crispy Topping
For an ultra-crispy finish, mix ½ cup crushed potato chips (like Ruffles) with the breadcrumbs before topping. The chips add a crunchy, salty contrast that makes the cheese rivers even more irresistible.
Another trick? Sprinkle 1 tbsp grated Parmesan mixed with 1 tsp garlic powder on top for a nutty, garlicky crunch. 💫
Nutrition facts
Frequently asked questions
Can I make this recipe without baking it?
Skip the baking step and serve it as a stovetop dish. After assembling the mac and cheese in a skillet, cover and cook on low heat for 10-15 minutes, stirring occasionally, until the cheese melts completely. Top with breadcrumbs and broil for 2-3 minutes just to crisp them up. The texture will be creamier but still delicious!
What's the best way to reheat leftovers?
For the best results, cover the leftovers with foil and reheat in the oven at 350°F for 15-20 minutes until warmed through. If using the microwave, add a splash of milk to loosen the sauce and cover with a damp paper towel to prevent drying. For that bubbly top, broil for 1-2 minutes after reheating.
Can I substitute the chicken with another protein?
Yes! For a seafood twist, use shrimp or crab clusters instead of chicken. For a vegetarian option, try crispy tofu cubes or sautéed mushrooms. Just ensure your protein is fully cooked and seasoned well to match the dish's flavor profile. The cooking time may vary slightly depending on the protein you choose.
Why did my cheese sauce get grainy?
Grainy cheese sauce usually happens when cheese isn't fully melted or when pre-shredded cheese is used (it contains anti-caking agents). Always grate your own cheese and keep the heat low to medium while stirring constantly. If it happens, whisk in a splash of warm milk to smooth it out. For extra creaminess, add a pinch of cornstarch mixed with cold water to thicken the sauce.
How can I make this dish gluten-free?
Use gluten-free elbow macaroni and replace regular breadcrumbs with gluten-free panko or crushed gluten-free cornflakes. For the roux, use a gluten-free flour blend like Bob's Red Mill 1:1. The texture will be slightly different but still delicious. Just be sure to check all ingredients for hidden gluten sources.